Secure Database Connection on AWS using RDS, SSM and EC2

When operating in a cloud environment, there are various ways to establish a connection with a database. Ensuring security is essential, which is why we often opt for using an EC2 instance as a bastion host in a public subnet. This allows authentication through SSH using key pairs.
For some scenarios, this is a viable practice, but managing the security of these keys isn't straightforward. For instance, if a developer leaves the project, a common security measure would involve changing the keys for all machines they had access to and redistributing new keys to the remaining team members. Correct? Moreover, what if we restricted access to port 22 of the bastion host to individual team IPs, thereby preventing DDoS attacks on the bastion host?
However, we'd still face the challenge of updating IPs for multiple developers whenever their machine IPs change or granting access permissions in Security Groups for them to update themselves, potentially causing security gaps that are difficult to monitor.
Whenever a developer leaves or switches to another project, we must remove their IP from multiple AWS accounts, projects, and environments (such as development, staging, production, among others), increasing management complexity.
Fortunately, AWS provides an effective solution that allows access management through IAM and connection to a private subnet through SSM (Systems Manager Session Manager) and VPC Endpoints.
Check below for a detailed step-by-step guide on connecting to RDS using SSM and configuring each resource.
Image of the implemented architecture:

Prerequisites
To begin, you'll need to set up the following tools and services:
VPC with DNS enabled
Private subnet(s)
Database on RDS
DBeaver or a similar tool for local database connection
To verify installation and your credentials, you can use the commands aws --version, session-manager-plugin, and aws sts get-caller-identity.

In this tutorial, I'm using a Linux environment through WSL.
Security Groups
With everything set up, we can create Security Groups for the VPC Endpoints, Bastion Host, and RDS (referenced with the same names used during creation: SG_SSM_ENDPOINTS, SG_SSM_BH, and SG_RDS, respectively).
You can use the same Security Group created during database creation or create a new one, as you prefer.
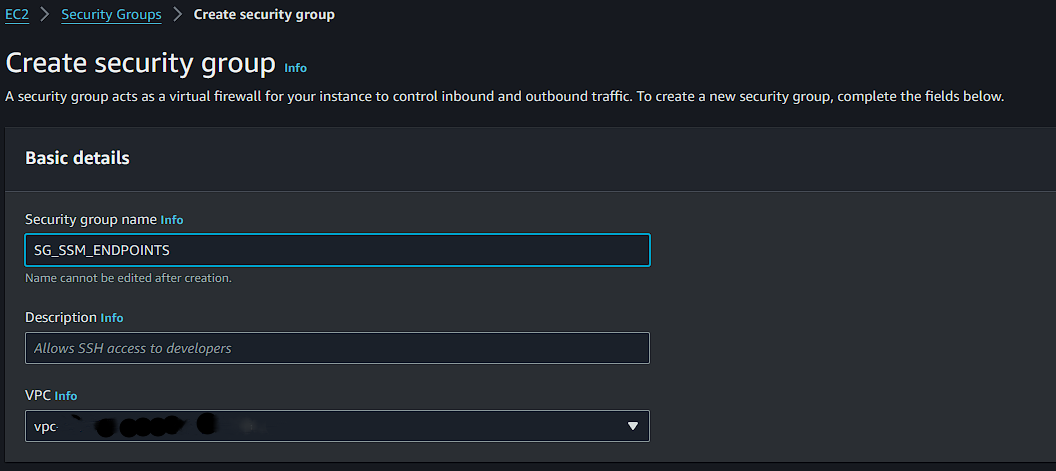
SG_SSM_ENDPOINTS
When creating a new Security Group, fill in its name, description, and VPC.
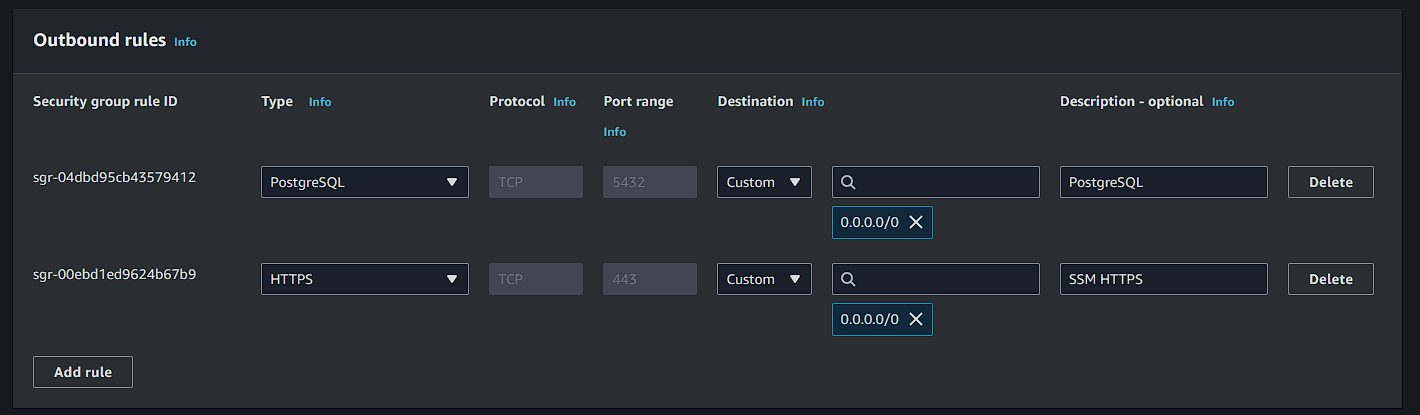
Inbound Rules: HTTPS input for your VPC's CIDR.

Outbound Rules: Data output for your VPC's CIDR.

SG_SSM_BH
Inbound Rules: Database input for SG_RDS.

Outbound Rules: PostgreSQL and HTTPS output to the internet.
SG_RDS
Inbound Rules: PostgreSQL input for SG_SSM_BH.

Outbound Rules: Output to the network.

IAM Role
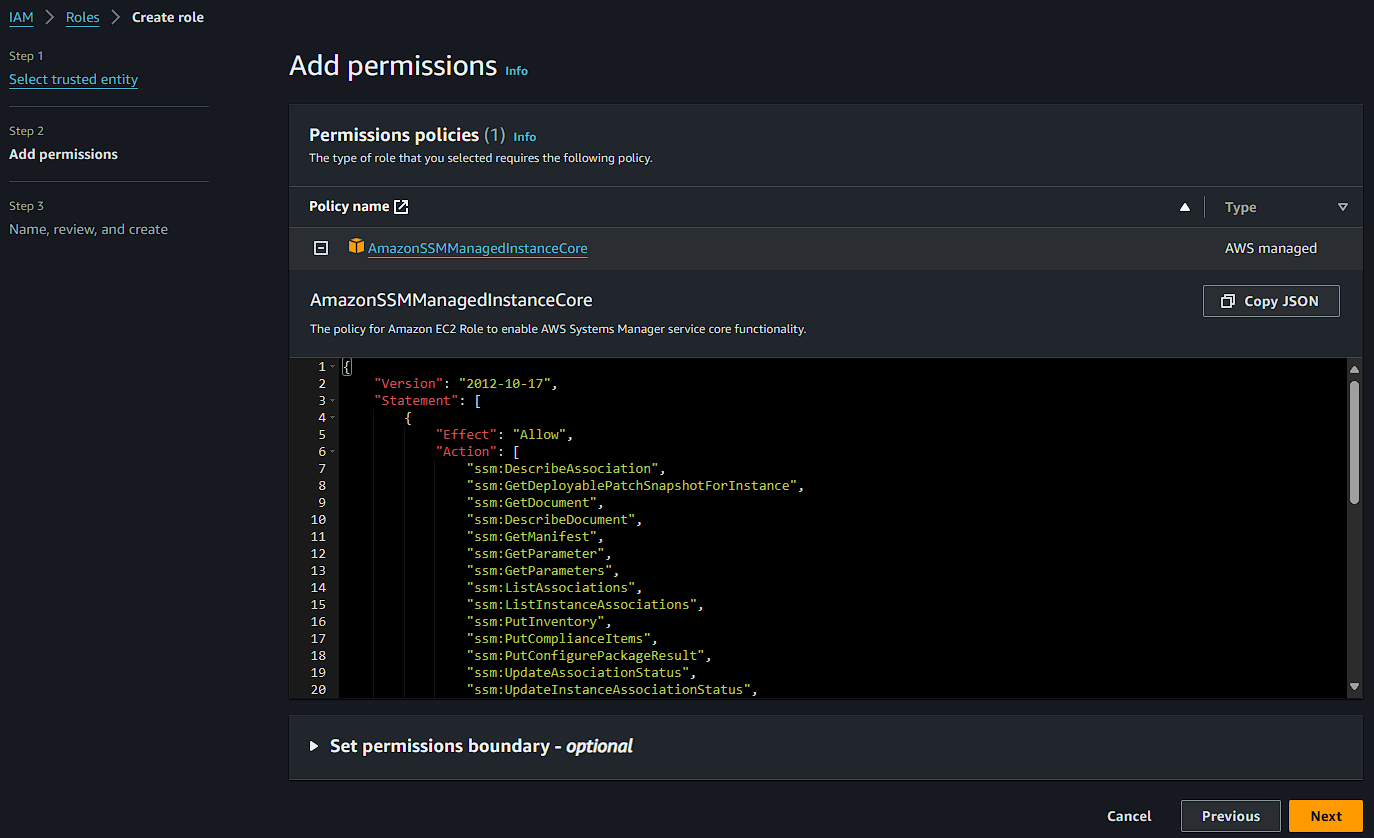
The next step is to create a role in IAM of the AWS service type. In EC2, select "EC2 Role for AWS Systems Manager" as shown in the screenshot below:
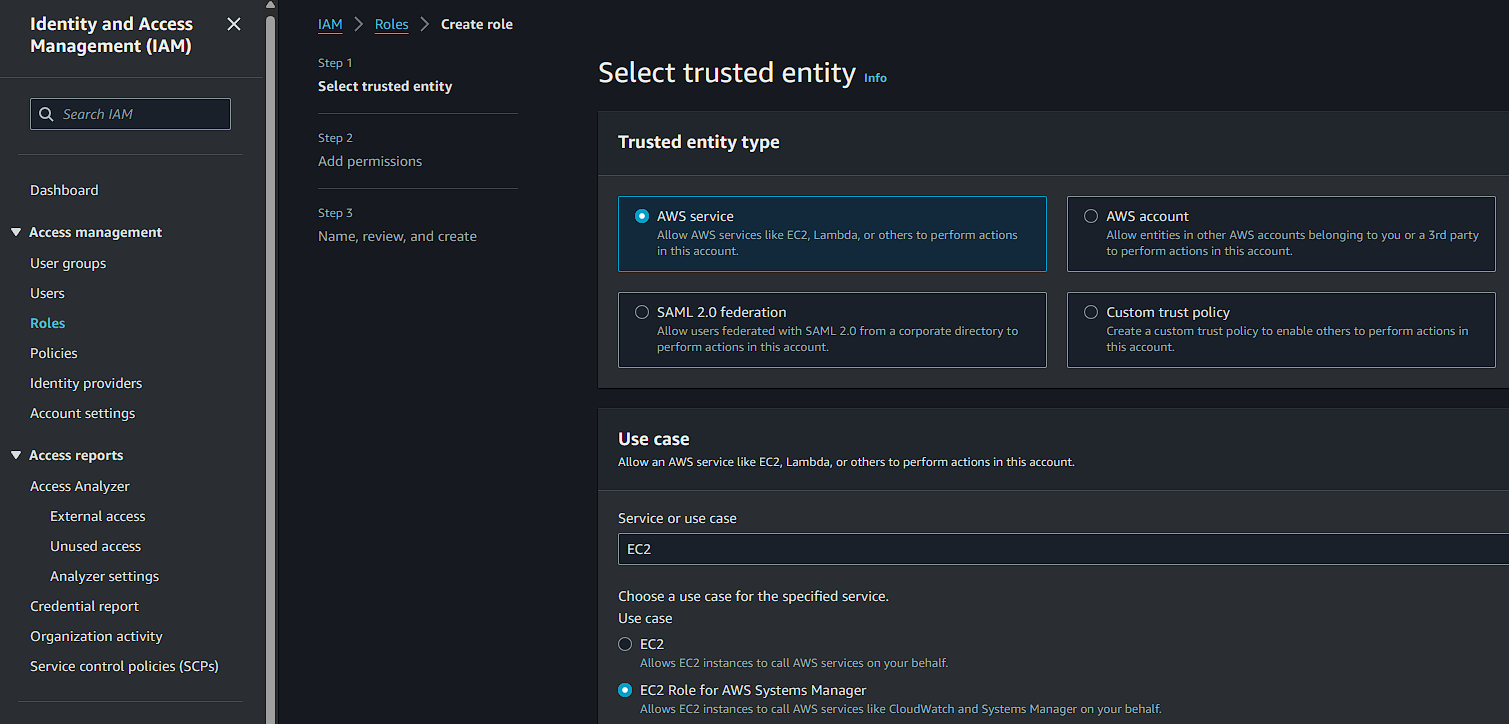
The managed policy AmazonSSMManagedInstanceCore will be automatically selected, click next.
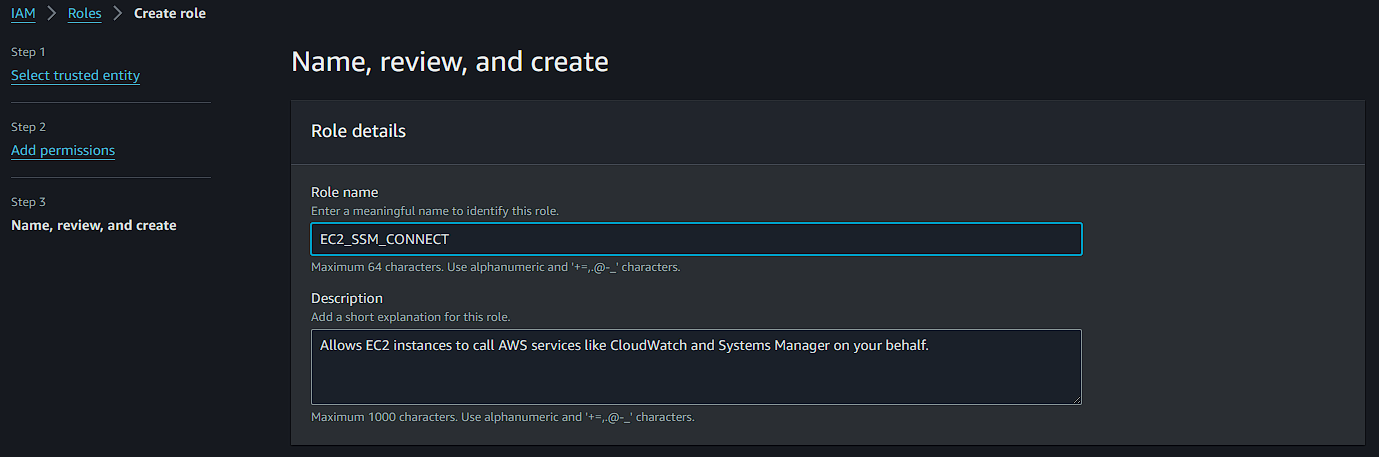
Fill in the role name and complete the creation.
Creation of VPC Endpoints
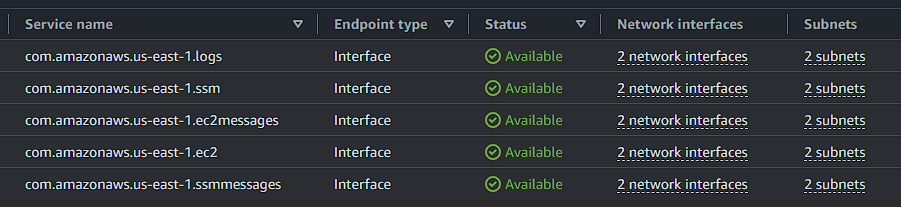
I'm using the 5 VPC Endpoints listed below, but only the first 3 are mandatory. This variation depends on your needs, and you can find details for each endpoint in the AWS documentation.
com.amazonaws.region.ssm
com.amazonaws.region.ssmmessages
com.amazonaws.region.ec2messages
com.amazonaws.region.logs
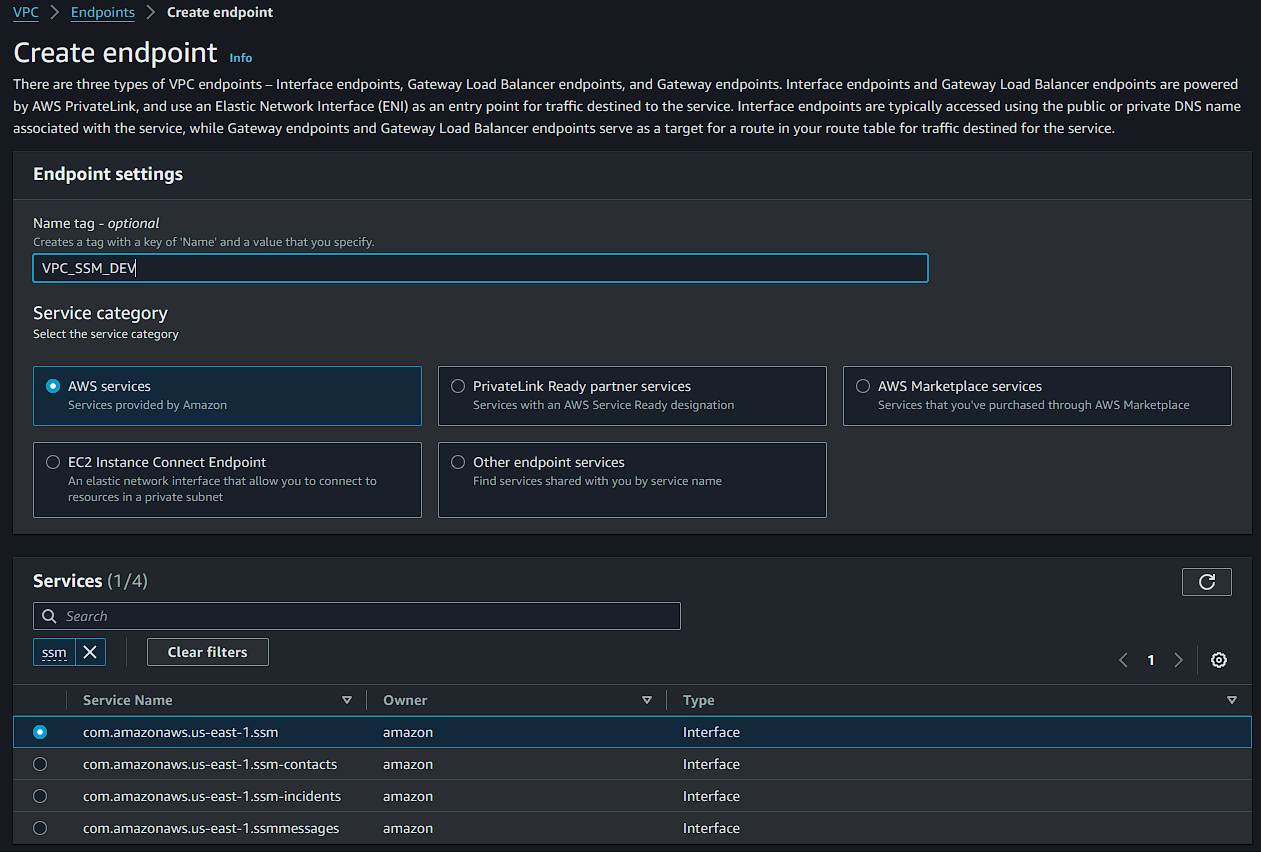
We'll start with the endpoint com.amazonaws.region.ssm.
Step 1: Fill in the name, select AWS Services, and search for ssm. Then, select com.amazonaws.region.ssm.
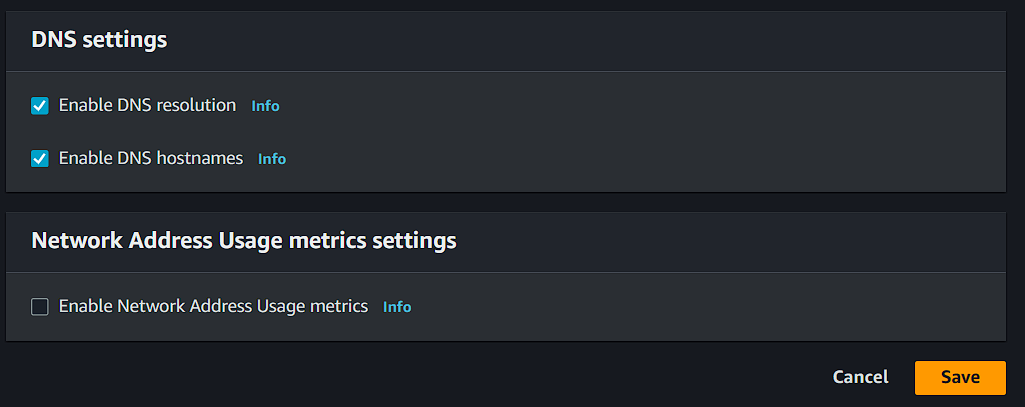
Step 2: Choose the VPC, enable DNS, and select your private subnets.
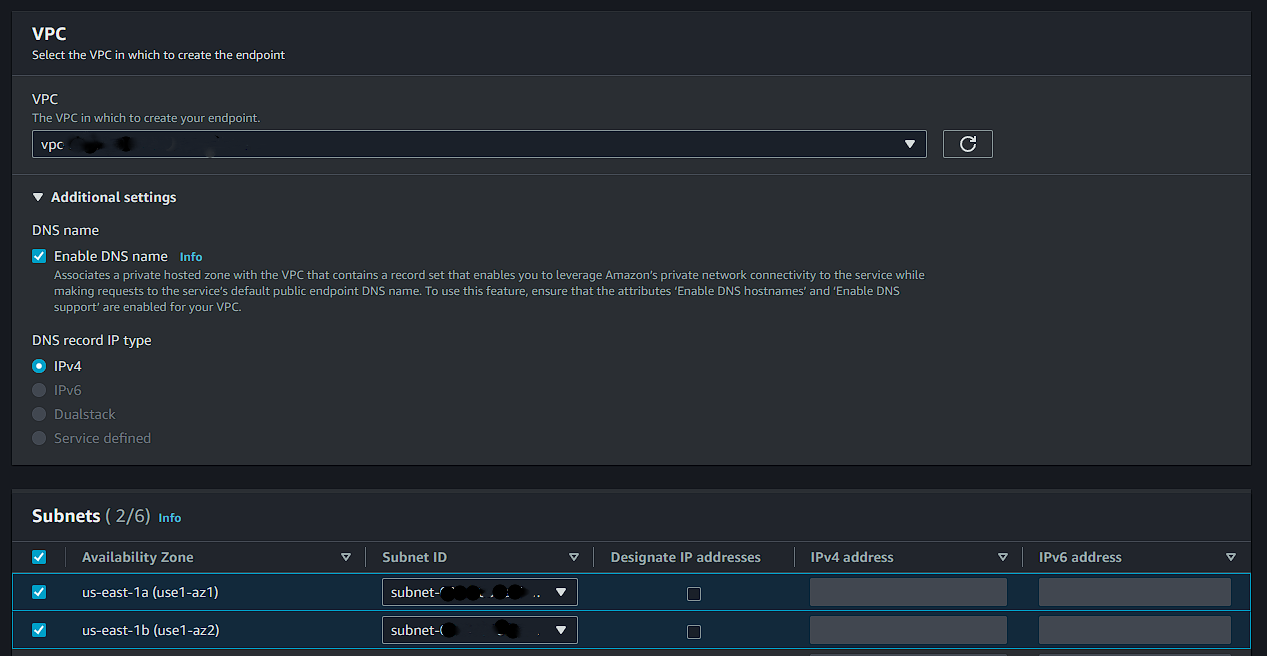
Step 3: Choose the security group SG_SSM_ENDPOINTS.
For this tutorial, I'm using the policy with full access.
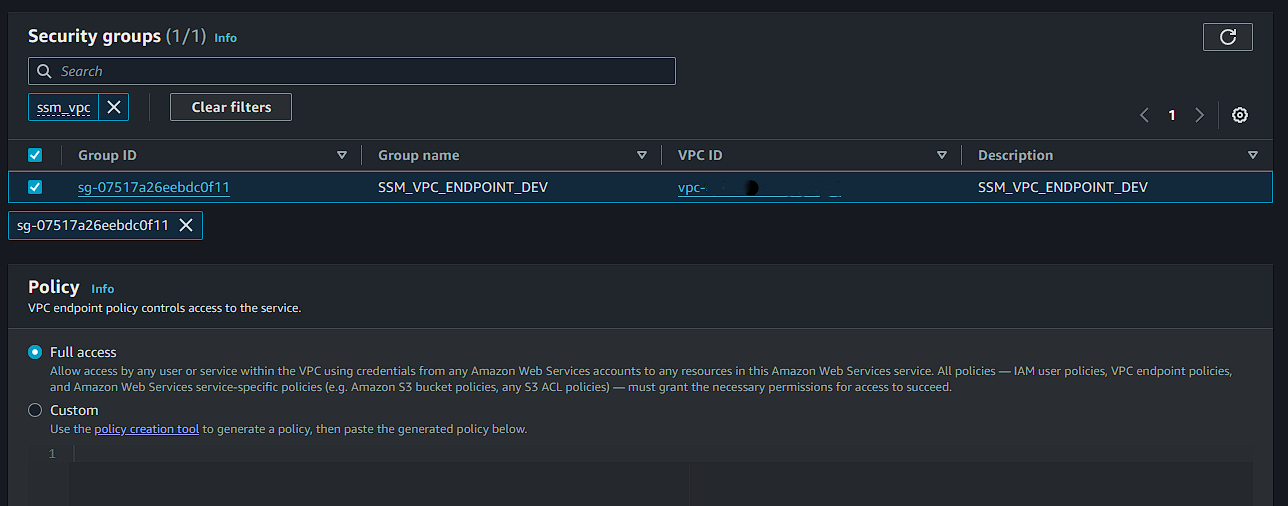
Now, simply click "Create endpoint". Remember to repeat these steps for each of the endpoints mentioned above.
If everything is correct, all configured endpoints will be listed and available.
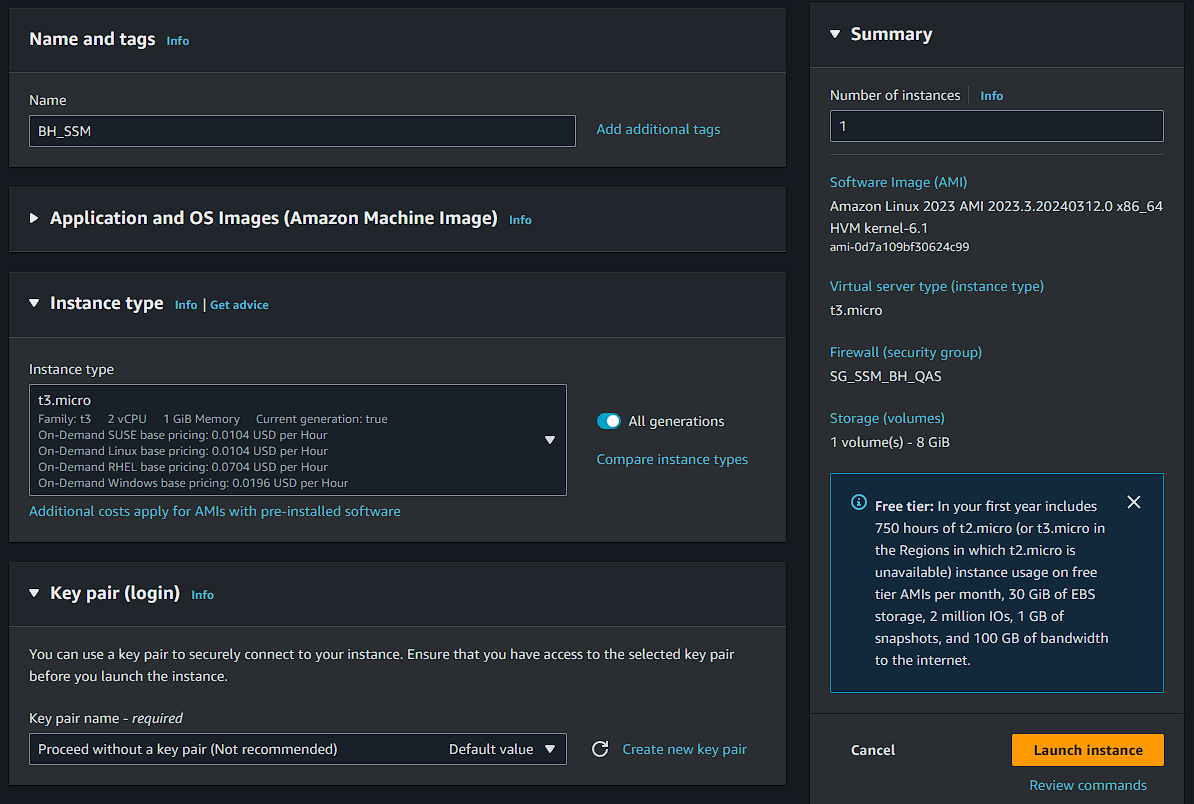
Creation of Bastion Host on EC2
Choose a name, operating system, and instance type, and proceed without associating key pairs.
In network settings:
Select your VPC, a private subnet associated with your database, and the security group of the Bastion Host (SG_BH_SSM).
The "Auto-assign Public IP" option must be disabled.
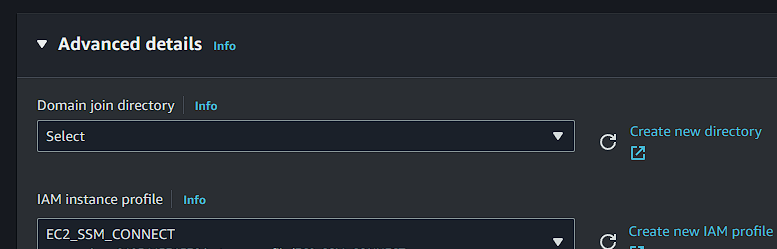
In advanced options, select the role we created (EC2_SSM_CONNECT) in the IAM instance profile field.
Click "Create instance" to finish and wait for the machine to be activated. Still on this page, copy and save the full instance ID with the following format: i-0xyz123.
SSM Agent
Check if the SSM agent is already active on the machine. Depending on the operating system, it may come pre-installed, or you may need to install it manually. If the agent is already installed, your EC2 instance will be listed in "Fleet Manager" and ready to be accessed.
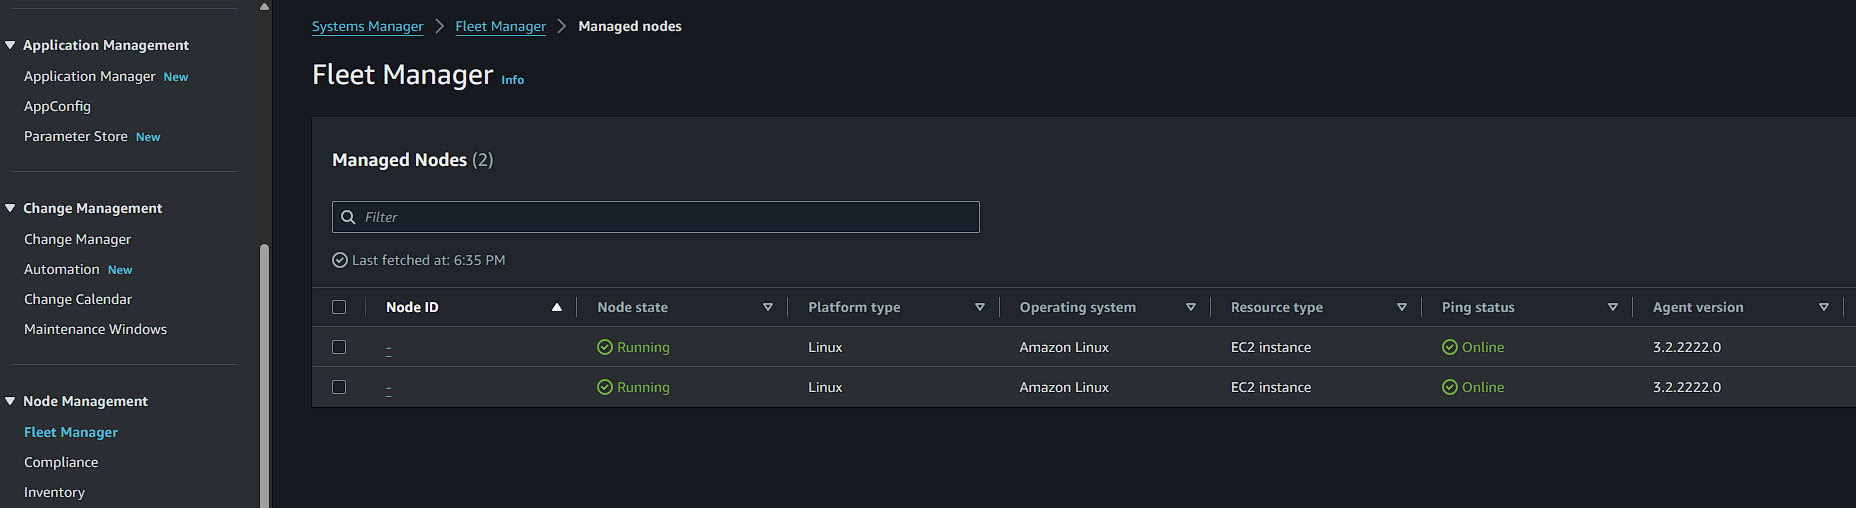
If it hasn't appeared yet, verify if the agent is active on the machine. You can also refer to the documentation for manual installation guides on different operating systems.
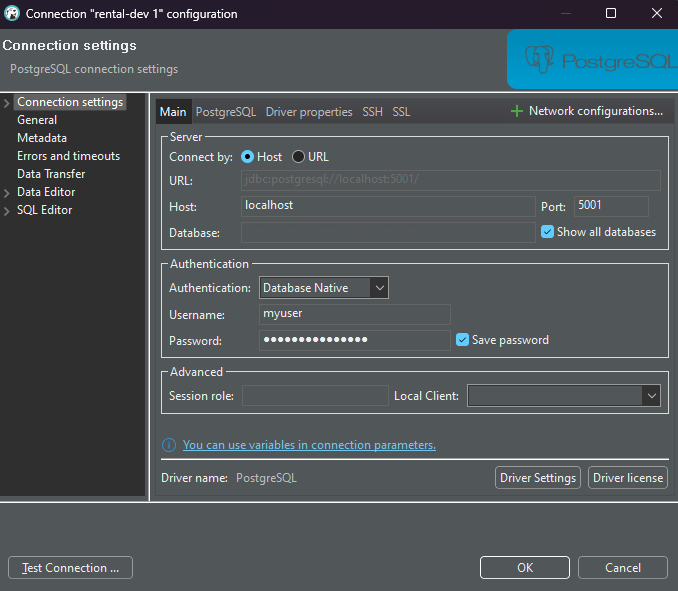
SSM Session and Database Connection
To prepare the command and initiate the session in SSM, edit the command below by filling in the EC2 ID and database host.
Fill in the portNumber with the database port configured in RDS.
For localPortNumber, use the port you'll use to connect to the local database.
The backslashes (\) in the command are just for visibility improvement. Depending on your system, they may not work. In this case, remove the backslashes, leaving only spaces between the parameters.
aws ssm start-session \
--target i-ID-ec2-bastion-host \
--document-name AWS-StartPortForwardingSessionToRemoteHost \
--parameters '{"host":["database.id.region.rds.amazonaws.com"],"portNumber":["5432"], "localPortNumber":["5001"]}'
If everything is correct, you'll see the message below in the terminal, confirming that your session has been started in SSM with the local connection port number.

Keep the terminal open to connect to the database. In DBeaver or a similar tool, fill in the username and password, pointing localhost to the chosen port.
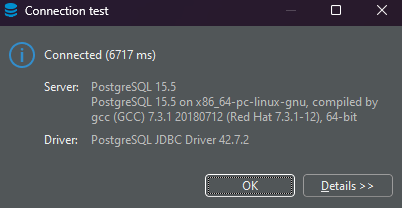
Now, you're securely connected!
If you're using high-privilege access in AWS, you won't encounter permission issues. However, if your team uses more restricted access, it's important to add SSM to their access policy.
Conclusion
You're now securely connected to the database and can conveniently manage RDS access. However, it's important to note that while the discussed approach offers a high level of security, there are other practices that may vary depending on each company's internal policy. I'll mention some that can be explored:
Avoid storing credentials directly in the code using AWS Secrets Manager or AWS Parameter Store.
Use RDS IAM Authentication to eliminate credential management.
Audit and monitor threats with AWS CloudTrail and Amazon CloudWatch.
Establish additional security layers through VPN connections, AWS Direct Connect, or AWS PrivateLink.
The Session Manager also offers session logs that can be saved in CloudWatch or S3, allows variable specification, inclusion of shell commands when starting sessions, integration with KMS, session time management, and much more.